Building a 2FA app for an iPod Nano
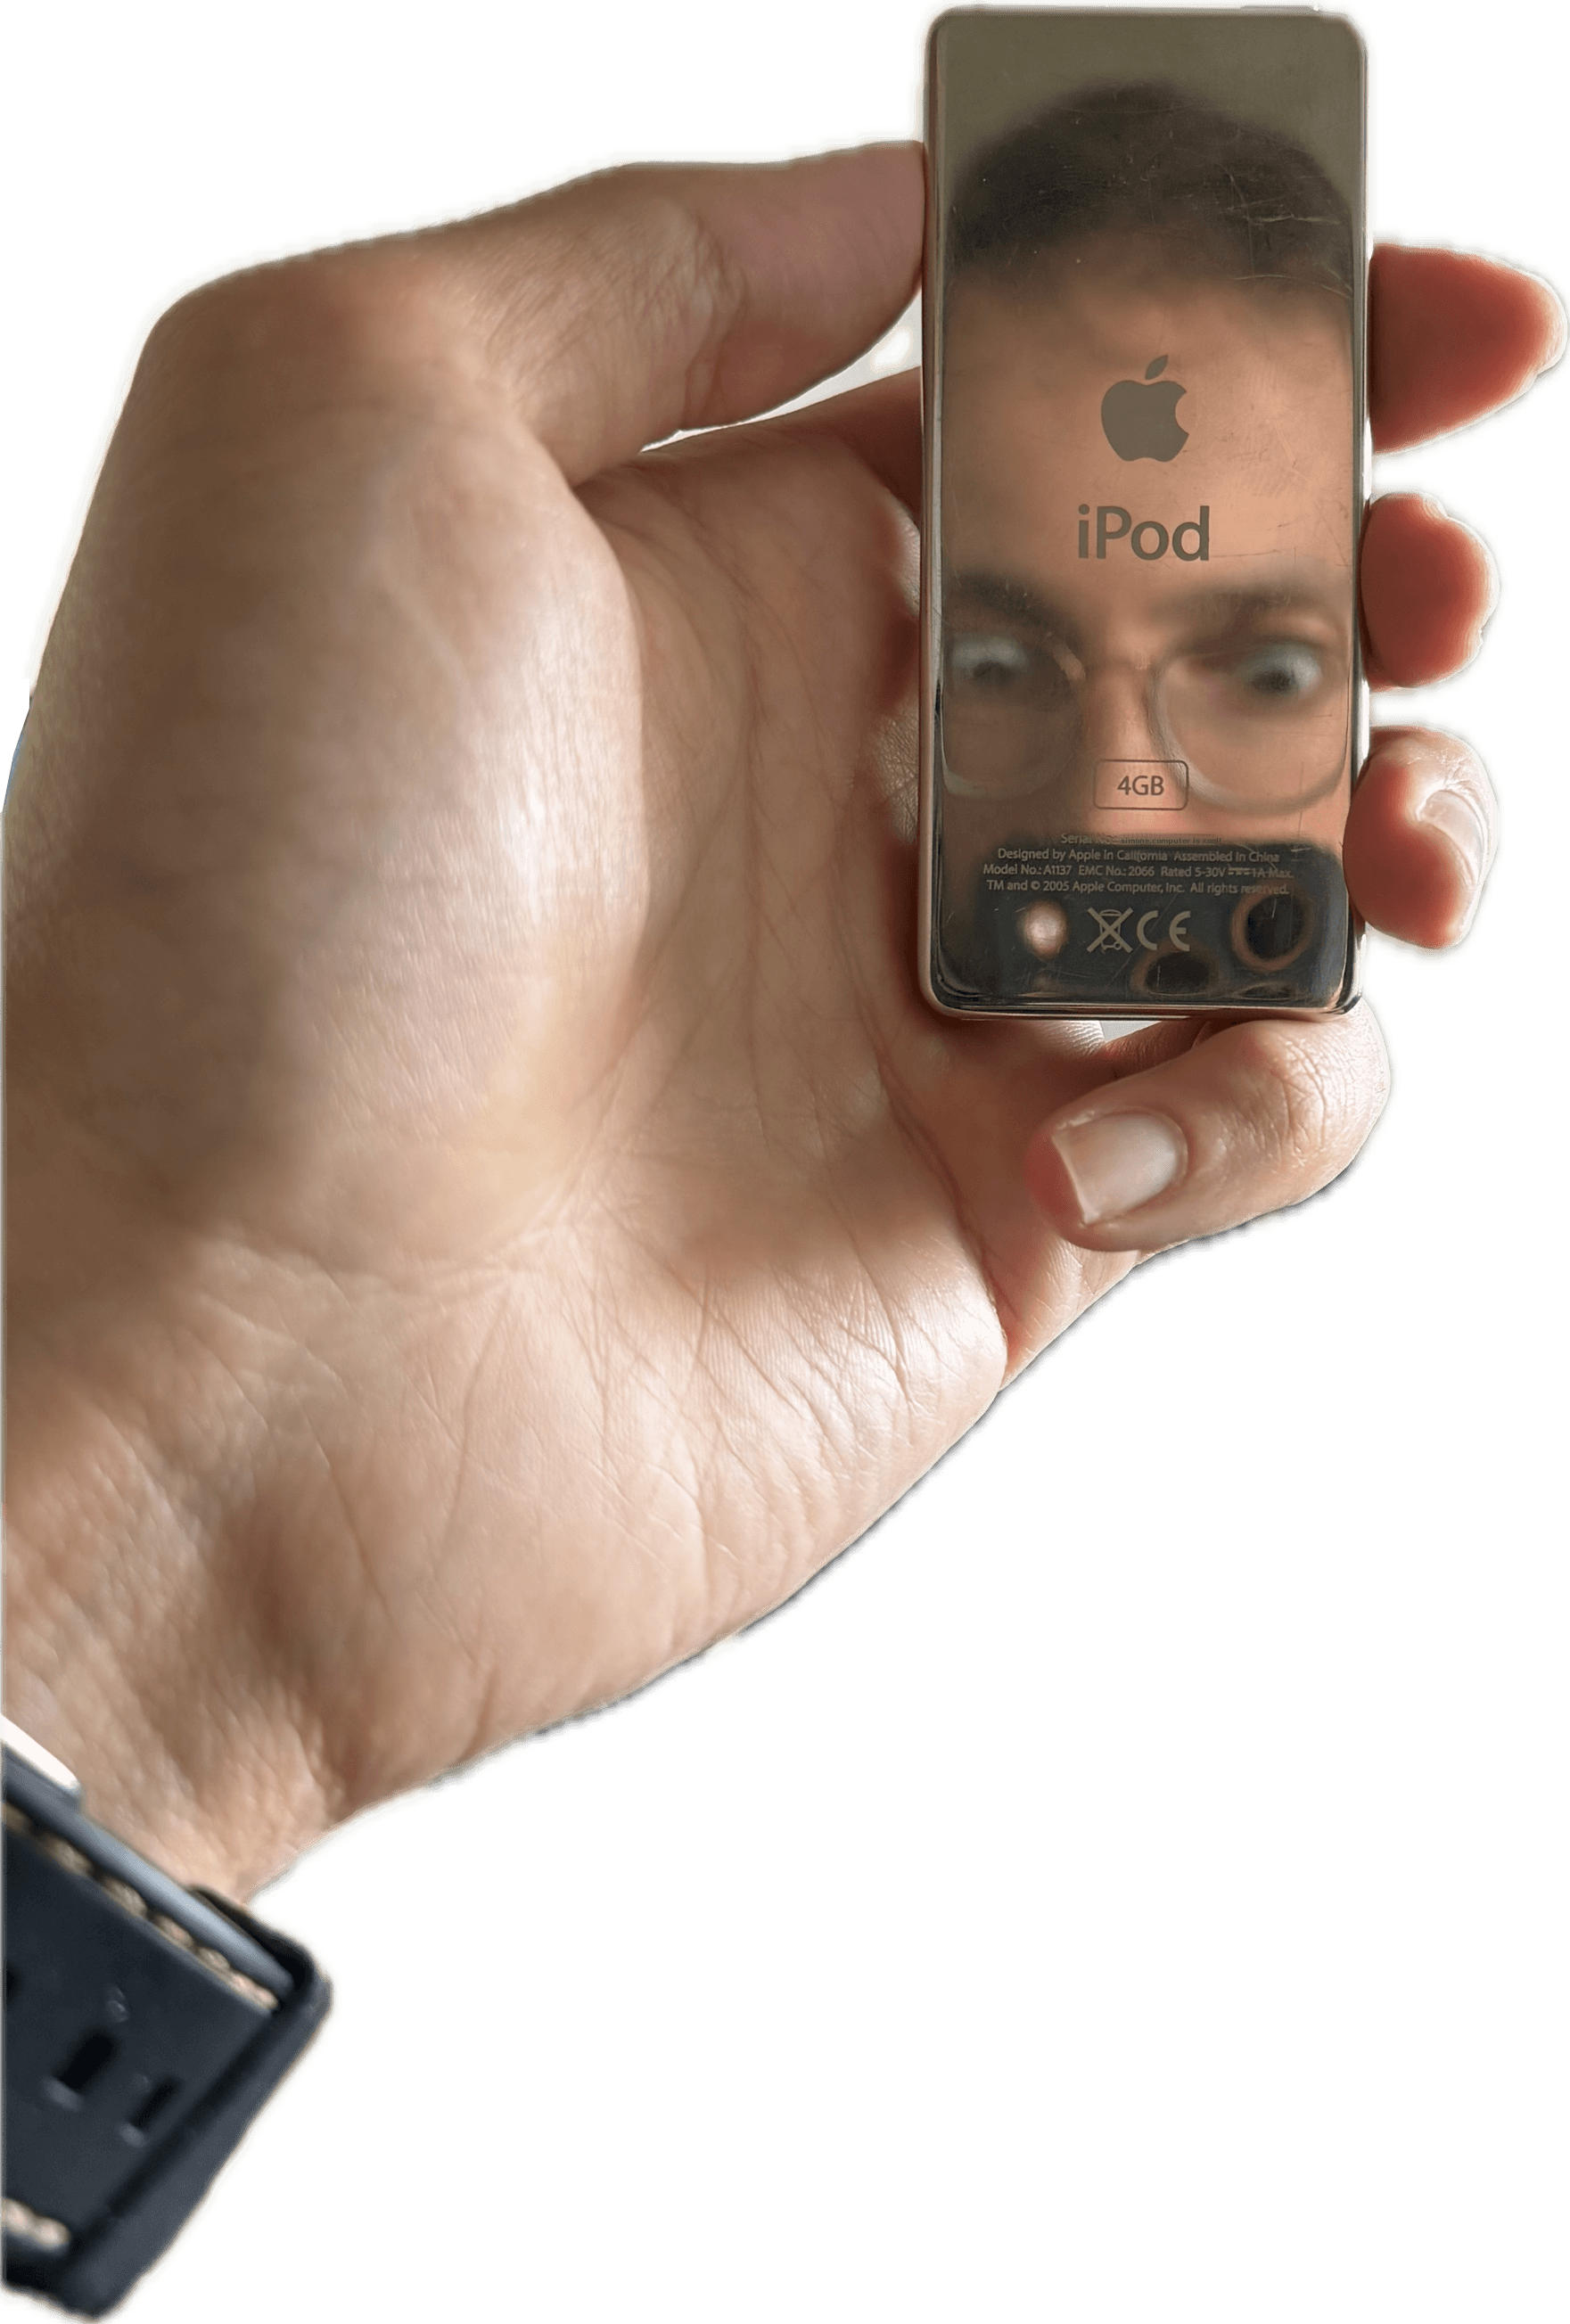
I had a shower thought recently while thinking about what first got me interested in computers back in 2006, and later in programming. I can trace it all back to a single event: buying my iPod Nano. Growing up with a clunky IBM clone, various versions of Windows 9x and XP, and a definition of a computer that I definitely couldn't lift (unless I wanted to give myself a hernia), using an iPod Nano felt like being handed a device by a time traveller from the future. Its design was absolutely out of this world for the time.
Lately, after reading various articles about returning to single-purpose devices (such as iPods) to escape today's centralised, monopolistic streaming platforms, I decided to spend a few quid on a used one just to see what the experience would be like in 2026. Needless to say, my muscle memory was incredibly rusty, but the convenience of Bluetooth earphones, faster track searching, and neatly organised playlists synced directly from my phone was impossible to neglect. While browsing subs like r/ipod, one thing that caught my attention was a piece of software I hadn't heard about in years... Rockbox.
I remember, as a teenager, spending days browsing forums and reading about iPodLinux and open-source firmware such as Rockbox. The idea that you could completely replace the software on your iPod fascinated me, even if I didn't (and probably still don't) fully understand the technicalities behind it. I found a myriad of skins and ways to customise my iPod with Rockbox, and it made me genuinely happy to discover that the project was still alive and rockin'. One of the coolest things to try back in the day was, of course, playing DOOM on an iPod using Rockbox!
As I'd been scrambling for months to find a comfortable niche side project, I started wondering: what's the weirdest use case I could find for an app running on an iPod? I immediately thought of a two-factor authenticator app. The idea sparked my curiosity because I'd never built one from scratch, and running it on an iPod was just too damn funny and awkward. So, if someone managed to port DOOM to the iPod, how hard could it be to write my own apps for it?
Naturally, I was ready to kick off a new obsession in my brain and go deep into this subject.
Flashing the iPod
Even though I assumed this would be one of the easiest steps, it turned out to be quite a hassle, with a few unexpected issues, especially since I only use macOS and Linux on a daily basis. The easiest way to flash an iPod is through the official installer for Windows. Since the installer expects the iPod to use the FAT32 file system, I had to dust off my old gaming laptop and get to work.
After patiently waiting for the installation to finish, the firmware was successfully installed and booted by default whenever I turned on the iPod. To boot back into the iPod OS, I had to reboot it using the and centre buttons, then flick the switch to the ON position while waiting for the Apple logo to appear instead of the Rockbox screen.
Fabulous! I didn't brick anything. Now, on to the next problem.
In order to start developing and compiling apps, which by Rockbox definition are plugins, I had to clone the official repo locally and compile the firmware according to my specific hardware. But before doing that I needed to build the ARM cross-compiler toolchain:
cd ~/Desktop/rockbox
RBDEV_PREFIX=~/rockbox-toolchain tools/rockboxdev.sh
The script downloads and compiles GCC 9.5.0 for arm-elf-eabi. This takes 15–30 minutes. The toolchain ends up in ~/rockbox-toolchain/bin/arm-elf-eabi-gcc.
Repo cloned, toolchain built, brew dependencies installed, now onto compiling the actual firmware:
export PATH=~/rockbox-toolchain/bin:$PATH

mkdir ~/Desktop/rockbox/build-ipod
cd ~/Desktop/rockbox/build-ipod
../tools/configure # select "ipod nano 1st gen" and build type "Normal"
make -j$(sysctl -n hw.logicalcpu)
This took a bit of trial and error, but in the end I had a clean compiled firmware in my build-ipod/ folder. Last step was to just copy the newly compiled firmware into my physical iPod Nano:
make install PREFIX=/Volumes/IPOD
Then I had to restart the device with and center buttons once again.
All good to go!
Troubleshooting the simulator
While building my first Hello World apps to familiarise myself with the prototyping workflow, I quickly realized that compiling the app, copying the binary onto the iPod, and restarting the device took far too long before I could get any meaningful feedback. Thankfully, the amazing rockboxui came to the rescue! It is quite literally a simulator of the Rockbox environment running locally on my Mac.
Building rockboxui was simple enough. The steps were exactly the same as building the real firmware, with the only exception being that when executing:
../tools/configure
I had to specify the build type (S)imulator instead of (N)ormal.
I hit the final make install which populates build-sim/simdisk/.rockbox/ with plugins, themes, and fonts, tried running ./rockboxui binary to spin up the simulator and...
Thread creation failed. Retrying
make_context(): Operation not permitted
Darn it, what does that even mean?!
I spent hours trying to wrap my head around this issue. Even after following the official docs, the error persisted, and the output simply wasn't verbose enough for me to properly investigate or find useful information online.
I was almost ready to give up when I realised that I wasn't motivated enough to spend any more time on it. The only solution left was to ask Opus 4.7 to fix it for me. I burned a few tokens, swallowed my pride and observed the machine overlord come up with the solution.
In total, there were four main issues:
- Thread creation failing (this was the main error in the output above)
- The process spawning, but no UI window appearing (something related to SDL window creation)
- The UI finally appearing, but clicking anywhere causing the process to freeze
- A segfault when browsing Demos and Apps
After an hour of back and forth, it figured everything out, and I genuinely couldn't believe my eyes. Rockboxui was finally up and running!
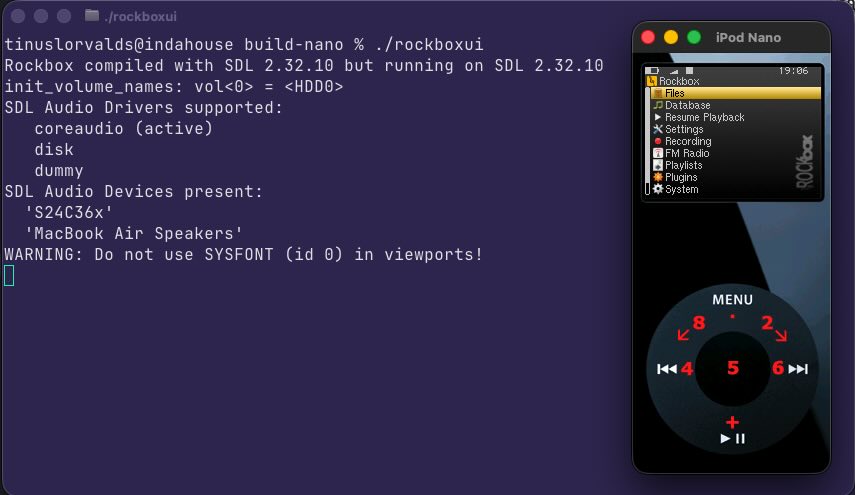
Except for the usual feeling of emptiness that a blindfolded agentic debugging session leaves me at the end, I was really happy to finally run my apps directly from the simulator. If you're curious, I've added a small Markdown recap to the GitHub repo for this project. It was written by Claude and details the issues encountered and the fixes applied to the original Rockbox source code. I'm not skilled enough to judge whether it's slop, but the app was running just fine, so I guess it did fix something.
Building the app
The Rockbox plugins are essentially plain C99 programs. It is quite easy to understand how they work: they are loaded separately from the core app, and Rockbox provides a struct plugin_api *rb, which is a huge struct of function pointers passed at load time. It contains time management, random number generation, and other APIs that can be invoked through this *rb pointer.
After looking at some of the existing plugins, I decided to model my code after the setup, update, and draw split used by LÖVE Lua. With this approach, a simple Hello World plugin would look like:
#include "plugin.h"

enum plugin_status plugin_start(const void *parameter)
{
  // MARK: Setup
  (void)parameter;
  int btn;
  rb->lcd_setfont(FONT_SYSFIXED);
  // MARK: Update
  while (true)
  {
    btn = rb->button_get(false);
    // exit the program when pressing MENU
    if (btn == BUTTON_MENU)
      break;

    // MARK: Draw
    rb->lcd_clear_display();
    rb->lcd_set_foreground(LCD_WHITE);
    rb->lcd_putsxy(0, 0, "HELLO WORLD"); // I kept reading this "put sexy" in my head
    rb->lcd_update();
  }

  return PLUGIN_OK;
}
Once completed, the app could be indexed and loaded into the Rockbox environment by modifying the apps/plugins/CATEGORIES and apps/plugins/SOURCES files.
The first Hello World prototypes were done, the simulator was running, and physical deployment was working properly. It was time to get to the real business: what other cool APIs could I use from that plugin.h?
The official doc for writing plugins was really great for getting started, but they felt a bit minimal. Instead of asking Claude to make me a sandwich and leaving my brain completely empty, I decided to have it read the entire project source code and every plugin in the repository, then write a tutorial-like Markdown guide teaching me all the core APIs I could use to develop plugins.
Initial PoC
The most important part of developing a 2FA app is calculating the OTP code from a secret (provided by the vendor) and the local timestamp of the device. The first step was making sure that whatever timestamp I was printing in the app was aligned with, for example, the one on my phone. I looked into the available APIs and found that I could use the get_time function together with mktime.
// store the main time object
struct tm *t = rb->get_time();
struct tm t_copy = *t;
// store the epoch timestamp
unsigned long now = (unsigned long)rb->mktime(&t_copy);
By printing these values in the simulator I saw alignment with my local OS but when deploying the app on the actual iPod Nano there was a misalignment of 1 hour... AH that's because Rockbox doesn't account for DST!
A quick UTC offset calculation did the trick:
unsigned long now = (unsigned long)rb->mktime(&t_copy) - (utc_offset * 3600);
This came at a cost of needing to store the utc_offset value somewhere in a config file. After that, clocks were aligned both phisically and in the simulator.
Next up was implementing the actual TOTP algorithm.
For those who don't know, when you decode the QR code generated during a 2FA setup, the result is a string that looks like this:
otpauth://totp/GitHub:myAccountName?secret=ON2G6Y3BPJ5G6&issuer=GitHub
See that secret? That's exactly the one I mentioned earlier, and it is what is needed to calculate the OTP.
After downloading pure C HMAC and SHA1 libraries from this GitHub repo, I could finally start writing a TOTP function like this one:
static uint32_t totp(char *secret, uint8_t period, uint8_t digits, unsigned long now)
{
  // decode the secret
  uint8_t key[32];
  int keylen = base32_decode(secret, key, sizeof(key));

  // calculate the counter (e.g. every 30 seconds)
  uint64_t counter = now / period;
  uint8_t msg[8];

  for (int i = 7; i >= 0; i--) {
    msg[i] = counter & 0xFF;
    counter >>= 8;
  }

  // HMAC SHA1 of counter + secret
  uint8_t digest[20];
  hmac_sha1(key, keylen, msg, 8, digest);

  // dynamic truncation (this took me a while to grasp)
  int offset = digest[19] & 0x0F;
  uint32_t code = ((digest[offset]     & 0x7F) << 24)
                | ((digest[offset + 1] & 0xFF) << 16)
                | ((digest[offset + 2] & 0xFF) << 8)
                |  (digest[offset + 3] & 0xFF);

  // calculate the number of digits to display
  int pow10[] = {1, 10, 100, 1000, 10000, 100000, 1000000, 10000000, 100000000};
  uint32_t otp = code % pow10[digits];

  return otp;
}
I won't explain how TOTP works in detail. You can read the beautiful RFC 6238, but the important part is that I wanted to support an arbitrary time period and number of digits, which are set to 30 seconds and 6 digits by default, respectively.
After deploying the app, I could see that the temporary GitHub OTP code was perfectly in sync with the one generated by an authenticator app on my phone. The PoC worked perfectly!
The UI
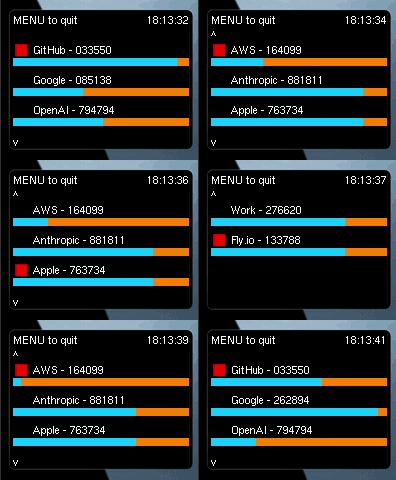
Next up was polishing the UI. Since I had only learned how to create basic geometric shapes, I ended up drawing some horizontal progress bars to indicate how much time was left in the current period for a single OTP code. I then added a moving red square cursor to indicate which item I was about to select (this will have a purpose later on).
I also implemented a simple pagination algorithm so I could loop through all the OTP codes saved in my config file.
The config file initially contained just a list of secrets that I could read directly from a text file. I then refactored this to support parsing the otpauth:// URI scheme, along with a manually configurable UTC offset value set by the user:
UTC=1
otpauth://totp/Wikipedia?secret=L3SKGV215DFEWNZL&period=30&digits=6&algorithm=SHA1
otpauth://totp/Fly.io?secret=L3SKGV215ZFEWNZL&period=20&digits=6&algorithm=SHA1
otpauth://totp/Anthropic?secret=S3SKUV214DFEWNZL&period=30&digits=6&algorithm=SHA1
I finished everything by adding a small time viewer in the corner of the screen and the ability to exit the app by clicking .
HID?!
While transferring files onto my iPod from my Mac, I noticed that whenever I touched the scroll wheel while the USB cable was connected, the volume on my Mac would go up and down. Immediately, something clicked in my head: oh my god, this thing is acting like a HID!
After researching the source code and the list of available APIs, I discovered that there was indeed a way to emulate a HID device and make my program act like a keyboard. I thought this was super cool, so I proceeded to implement a feature in my 2FA app where, whenever the user selected a specific OTP code using the red square , the HID interface would send the signal to my laptop and type the code as if it were an external keyboard.
Here's a demo:
Using the APIs was very simple. All I had to do was wrap the code responsible for handling the HID logic with a #ifdef USB_ENABLE_HID so that the compiler would know which sections should use the HID API functions. This obviously did not work in the simulator, so I had to do a lot of testing directly on my physical iPod.
Final words
Mid-development, while exploring the source code, I realised that there was already a much cooler two-factor authenticator app developed by Franklin Wei ten years ago: otp.c. My hopes of making something unique were immediately shattered :)
I still had a lot of fun exploring what I could do with Rockbox, and I was really happy to uncover many of the mysteries that had fascinated me since I was a teenager.
The source code and all the assets are available on GitHub, including the Rockbox firmware fork I made with the simulator fixes required to support my M2 MacBook. I highly discourage using this app in a real-world setting though, as I don't think it is very secure. Although considering how difficult it was to find an Apple 30-pin cable lying around my house, perhaps gaining physical access to my iPod and stealing my secrets is not exactly straightforward after all.